Please follow this link: https://status.azzure-creative.com/
How do I backup emails for Apple Mail?
Whether you prefer a simple solution or a more advanced approach, these methods provide various ways. There are several options to backup mail on Mac to protect your data from loss or damage. See the top 2 methods available.
Method 1: Back Up Emails on Mac Using Email Clients
Once you've obtained your email server information by accomplishing the prerequisites, you'll need to set up your account with the email client to back up your messages. The steps to do it using three different email clients are provided below.
Microsoft Outlook
Outlook is a popular email client used on Mac to manage your email accounts. It can help you manage your email, calendar, and tasks all in one place. In addition, Outlook also allows you to back up your emails to prevent data loss and ensure that you have access to your important emails, even if something goes wrong.
To easily reduce the size of your inbox, manually archive email messages, contacts, and other items to an Outlook for Mac Data File (.olm). An.olm file can be saved to any location on your Mac or to a different machine for safekeeping.
Here are the steps to back up your emails using Outlook on Mac:
- Step 1. Select Export from the Tools menu.
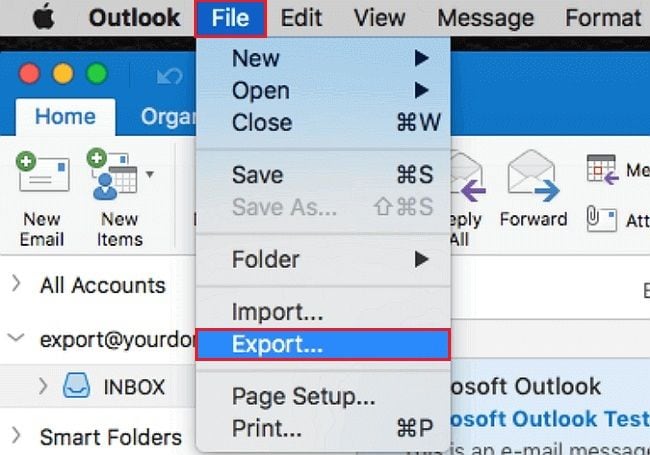
Note: Need help finding the Export button? Check that you have the most recent version of Outlook. Click Check for Updates from the Outlook Help menu. If you've installed all Outlook updates, look for Export on the Outlook File menu.
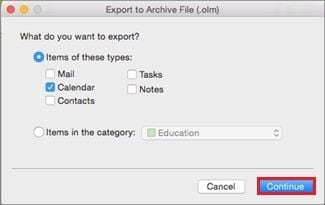
- Step 2. Check the items you want to export in the Export to Archive File (.olm) box, then click Continue.
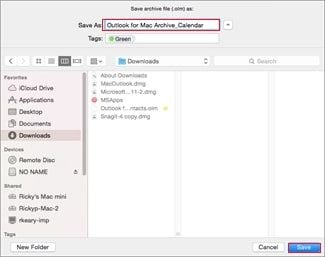
- Step 3. Choose the Downloads folder under Favorites in the Save As box, and click Save.
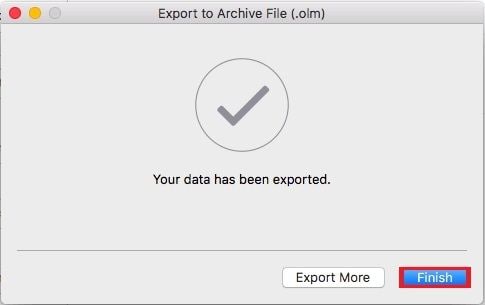
- Step 4. You will be notified once your data has been exported. Select Finish.
Thunderbird
Thunderbird is an open-source email application that can be used on Mac to manage your email accounts. It is a reliable tool that can help you manage your emails, contacts, and calendars all in one place.
To back up your emails using Thunderbird on Mac, comply with the instructions below:
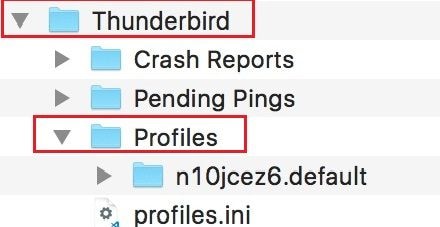
- Step 1. While on your Mac's home screen, select Go. Hold the Option Then click on Library.

- Step 2. Navigate to Thunderbird > You should see a list of profiles currently on your device.
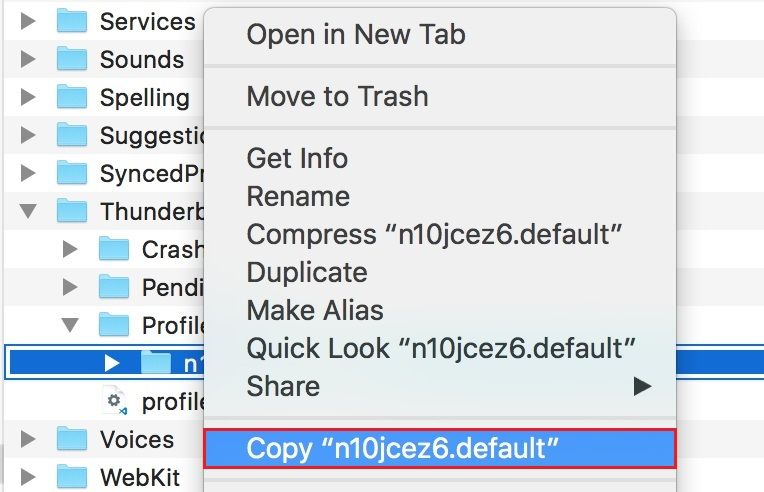
- Step 3. Copy the desired profile(s) and paste/save them in a desired location.
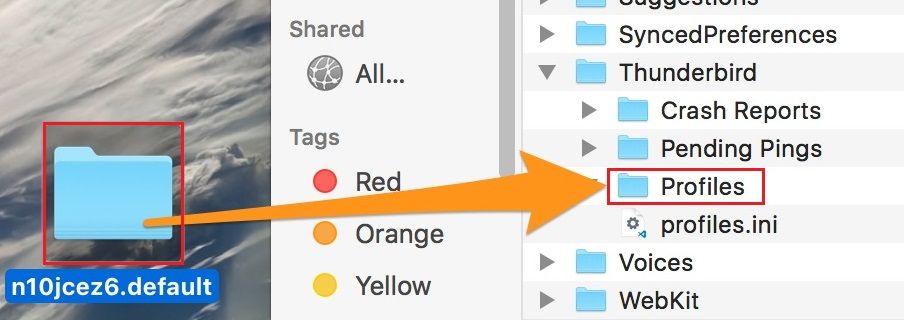
- Step 4. To restore, drag & drop your backup profile(s) to Thunderbird >Profiles.
Mac Mail
Mac Mail is the built-in email client for macOS that can be used on Mac to manage your email accounts. Here are the steps to back up your emails using Apple Mac Mail on Mac:
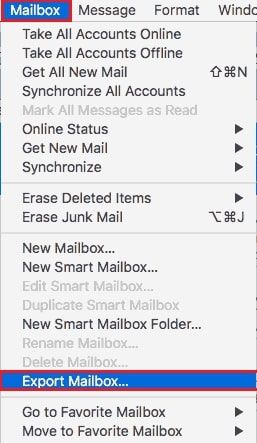
- Step 1. Open Mac Mail and select the account that you want to back up. Go to the Mailbox menu and select Export Mailbox.
- Step 2. Please choose the location where you want to save the backup file and give it a name. Click Save to start the backup process.
Mac Mail will create a backup file in the format of an MBOX file, which contains all the selected items from your email account. You can save this file to an external hard drive or cloud storage for safekeeping. If you ever need to restore your emails, open Mac Mail, go to the File menu, select Import Mailboxes, and choose the MBOX file to restore your emails.
Note: Mac Mail also provides an option to create a backup of your entire Mail library, which includes all your email accounts, settings, and messages. To create a library backup, go to the Mailbox menu, select New Mailbox, choose the location where you want to save the backup file and give it a name. Drag all your email accounts and folders into the new mailbox, and then copy the new mailbox to your backup location.
Method 2: Back Up Emails on Mac Using Time Machine
Time Machine is the built-in backup feature for macOS that can be used on Mac to back up your entire system, including your email client and data. It is a tool that can assist you in protecting your data against accidental deletion, system crashes, or hardware failures.
The procedures to back up your emails on a Mac using Time Machine are as follows:
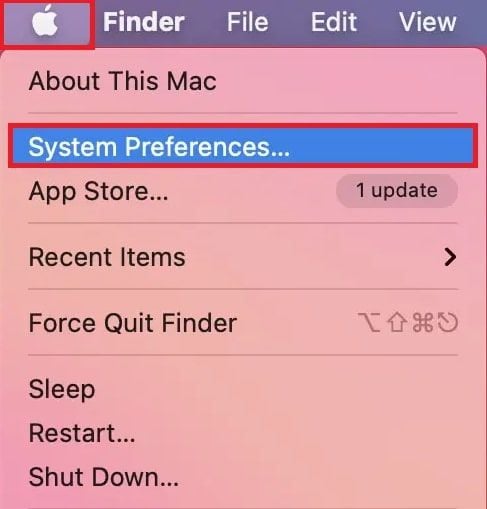
- Step 1. Connect the hard drive to your Mac that you want to use for Time Machine backups. Go to the Apple menu and select System Preferences.
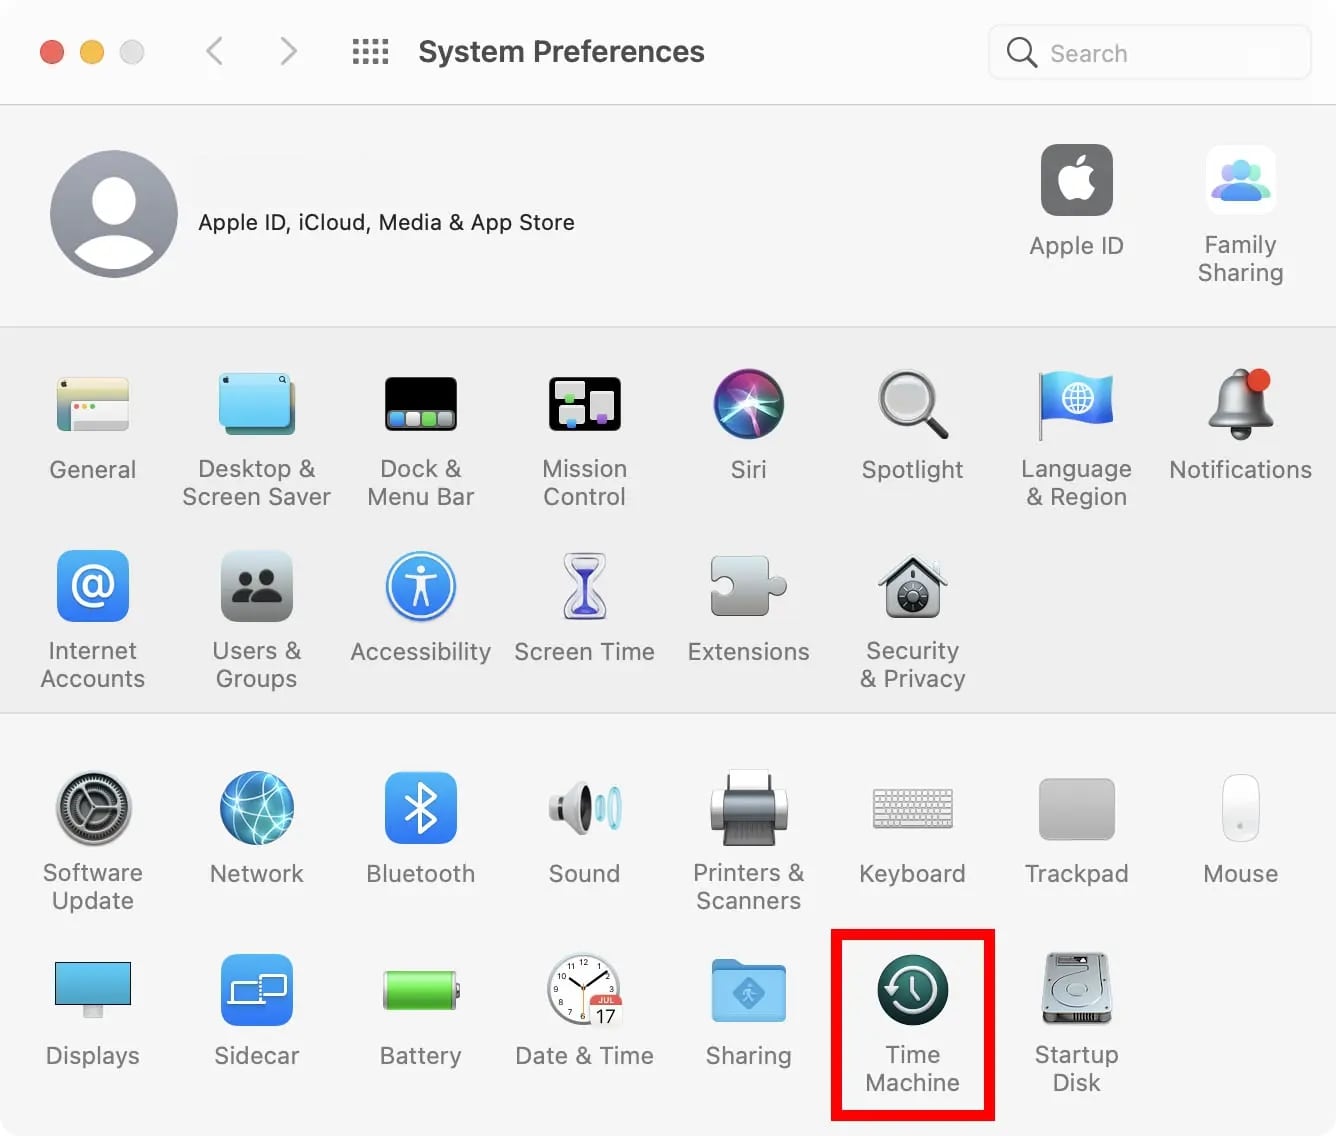
- Step 2. Click Time Machine and turn on Time Machine if it is not already on.
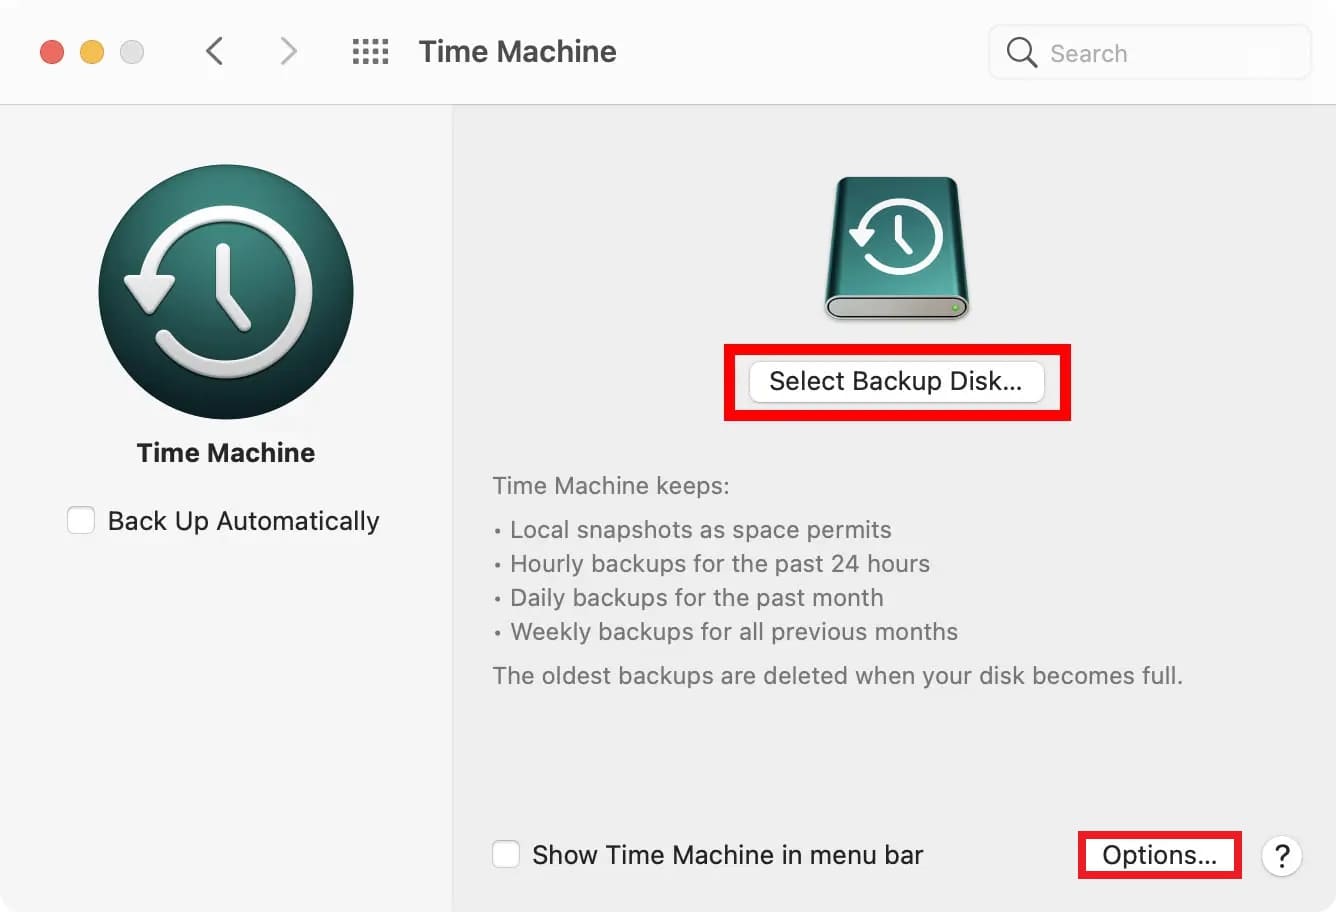
- Step 3. Click the Select Backup Disk button and choose the external hard drive you connected. Then, click Options and select the email client and data you want to back up, such as Mac Mail or Outlook. Lastly, press Save to apply the changes.
Time Machine will now start backing up your email client and data regularly. You can access your backups by clicking the Time Machine icon in the menu bar or opening the Time Machine app from the Applications folder.
Note:
- To restore your emails, enter Time Machine and browse the backups to find the email client or data you want to restore. Once you have found the backup, please select it and click Restore to restore your emails.
- Time Machine backups can take up a lot of space on your external hard drive, so ensure you have enough space for your backups. Additionally, it is recommended to have a backup strategy that includes both Time Machine and offsite backups to protect your data against all types of data loss scenarios.
Aside from the said methods, you can back up Mac emails using third-party tools. Many email backup software is available, you can select the appropriate one based on your requirements.
Backing up emails to an external storage device is another simple and effective solution.
-
Are there any restrictions or rules on the domain name I can choose to register?
-
How do I change the contact details on my .com and .co.uk domain names?
-
How do I obtain the authorisation code/EPP code for my domain?
-
Whats the maximum MySQL database size allowed?
-
How do I import a .sql file via phpMyAdmin?